If you’re planning to utilize Snap Camera for Zoom and Google Meet to enjoy its magical Lenses when you are in video chat, how do you do? This can be done quickly by following this step-by-step guide that comes from MiniTool. We will now go through it and find specifics below.
You may have heard about the camera application Snap Camera. Snap Camera. It is hilarious because it brings the power of Lenses to your live stream and video chats on PC and Mac. You can be yourself through Lenses, Bitmoji, Filters, and more.
For instance, Snap Camera can use Zoom and Google Chat. For video chats that use Lenses for collaboration to make it enjoyable. Do you understand how to utilize Snap Camera on Zoom & Google Meet? Go to the next section to get the answers.
What is a Snap Camera?
Snap Camera is a virtual camera app developed by Snap (formerly Snapchat) that allows you to use virtual backgrounds, makeup, and filters on any Mac and PC.
The best thing about it is that Snap Camera filters are available with any program on your PC. This guide will show you the use of Snap Camera in your favorite video apps:
- Sendspark
- Zoom
- Google Meet
Also, ways to solve typical technical issues using Snap Camera.
If you’re trying to utilize Snap Camera on a different platform that isn’t listed, don’t worry! When you’ve mastered how it functions and works, you’ll be able to snap a camera with any app running on your Mac or PC to make up backgrounds, background images, or other fun filters.
How do you download and set up your Snap Camera with Google Meet?
The first thing you’ll need is to download and set up Snap Camera. Snap Camera. It’s an easy task. Check out the Snap Camera website and select the Download option to begin. You’ll require Windows 10 (64-bit) or higher or macOS 10.13 or higher to install and download Snap Camera.
After downloading, locate the document on your desktop and double-click it to install. If you’re using a Mac, you’ll have to move the file onto the file for applications (when you double-click on the file you downloaded, it typically immediately shows you the steps you need to do).
Start the snap camera, and you’ll view your face on the screen. This is it! You’ve got your Snap Camera. Pick the desired filters and lens from the listing and then check the results within the video stream view. Next, we’ll go to the next step to configure Snap Camera to configure Snap Camera to work with Google Meet.
How to Use Snap Camera on Google Meet?
There are two ways to use the Camera available on Google Meet – the first option is to sign in through Gmail or to log in via Google Meet directly from the site.
Method 1: Gmail login
Step 1: Log in with your Gmail account. You will find two choices under Meet New Meeting on the left-hand part of your Gmail homepage. You can also join an existing appointment.
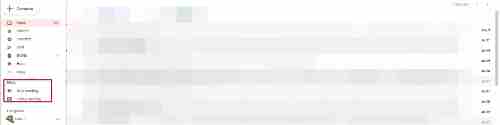
Step 2: Choose “New Meeting” and then decide to invite a URL or begin today. Click here to”Start now,” and a Google Meet pop-up will tell the user the default source of the Video.
Step 4: Hit the three dots in the preview screen, then choose settings.
Step 5: Within the Settings option, change to the video option, and there you’ll see that the first choice will appear, which is “Camera.”
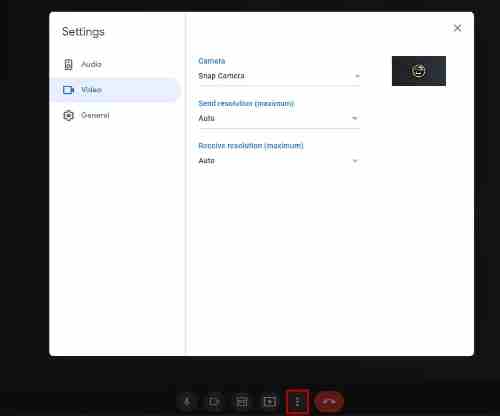
Step 6: Select the options beneath the camera choice and then select Snap Camera. Snap Camera.
Step 7. Set the resolution at 720p or the most appropriate solution in the key of sending and set the receiver resolution to match.
That’s it! You can now make use of Snap Camera for your Google Meet messages! Look at the second way to log in to Google Meet: directly from the Google Meet website.
Method 2: Access Google Meet from the website
Step 1: Go to Google Meet.
- If you’re signed in, you’ll view the home page, showing two options: New Meeting, which permits you to set up the meeting from scratch, and Join an existing discussion that requires you to enter a code or hyperlink. To create an entirely new arrangement, select “New meeting” and choose Start an instant session you want to make. Also, you can set up an appointment for future dates or a meeting on Google Calendar. If you do not see either of these options, you need to sign in; then, you can access these two options.
Step 3: Follow these steps to set up your Snap camera and then utilize it as a component of the Google Meet session.
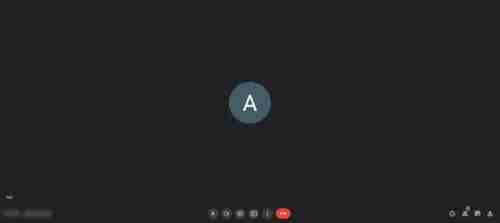
Move your mouse across the lower part of the screen for the menu to show up (find an audio microphone, hang-up, and camera buttons), and then click on the three dots in the upper right corner of the display.
In the Settings option, Choose the Settings tab in the menu. Open the account for the Video by clicking Video. When you do this, the first choice you will see will be “Camera.”
- Please select the option under the camera option and choose one of them. Snap Camera.
- The resolution should be 720 pixels or the best option for you.
How Do I Add Snap Camera To Chrome?
Choose ‘Video’ from the menu. Select Snap Camera from the options after selecting the dropdown menu beneath the option ‘ Camera. If you sign up for a group through Google Meet, you will choose Snap Camera as your Camera, and the filters you pick will be applied to the Video.
How do you add a Snap Camera To Google Meet by logging through Gmail?
Below is the step-by-step process to connect your Snap Camera to Google Meet through Gmail:
Step 1: Log In To Your Gmail
Use your internet browser to go to the Gmail site. Log in using your email address as well as your password.
Step 2: Tap On Nine Dots
Click the nine-dot icon at the top of the screen’s right-hand corner near your profile photo. Click “Google Meet” from the dropdown menu listing the available Google apps. Google applications.
Step 3: Start New Meetings
When in Google Meet, click the link to create an entirely new meeting. The meeting will appear as a menu floating with various possibilities, like setting up an appointment for later or an instant forum and scheduling meetings in Google Calendar. Select the option to create immediate sessions.
Step 4: Click On Three Dots On the Preview Screen
In the screen you preview, three dots are in the display’s lower part. Select these dots to launch a settings menu. There will be audio-video options as well as general options.
Step 5: Go Through The Camera
Within the setting options, select the video option. The settings for the Camera will be displayed, including the camera choice sending resolution and the resolution received. Choose “Snap Camera” from the cameras available.
Step 6: Set Up The Resolutions
Adjust both the send resolution and the receive resolution to the highest resolution that is available. This will ensure the optimal quality of the Snap camera filters in the Google Meet session.
How To Use Snap Cam With Google Meet Using Third-Party Inputs?
Snap Camera is compatible with Google Meet using third-party inputs such as Canon EOS or EpocCam by using these instructions:
Step 1: Open Snap Camera App
Start the Snap Camera app on your PC and sign into it using your username and password. Look for the default camera inputs that are available in the app.
Step 2: Tap On Camera Settings
Find the camera settings icon in the upper right-hand of Snap Camera’s Snap Camera interface. You can click it to open the camera settings menu that offers a variety of options.
Step 3: Tap On Choose Your Camera
Click on the “Choose Your Camera” button from the settings available. It will display a dropdown menu that lists all options for camera inputs available to select.
Step 4: Select The Desired Camera Input
In the dropdown menu, select the camera input you want to use with your Snap Camera. After selecting, you can configure your Snap Camera according to your preferences.